
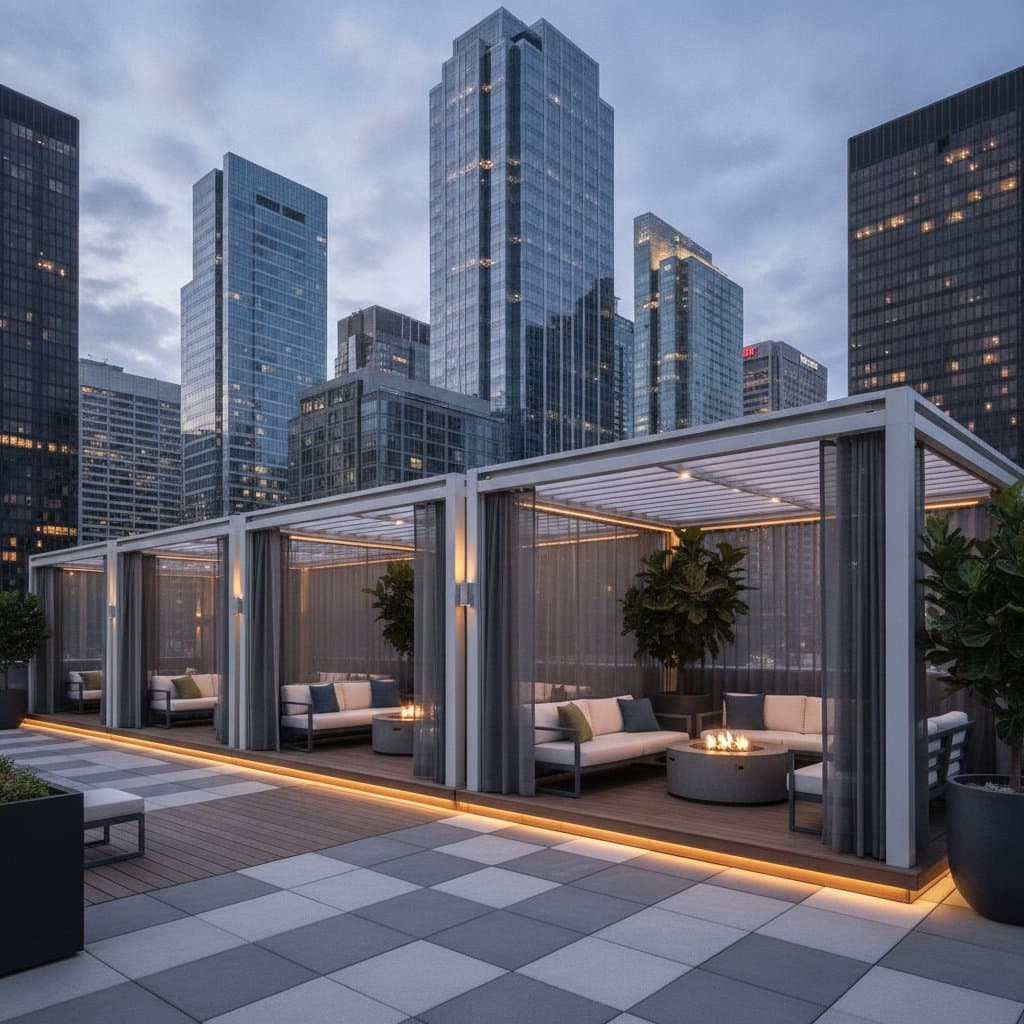
Pergola Pods Turn Rooftops Into All-Weather Rooms
A pergola pod converts an open rooftop deck into a versatile outdoor room. These modular enclosures deliver shade, privacy, and weather protection while preserving an open view. The following sections explain the components, planning process, and maintenance requirements for a safe, durable installation.
Core Features
A pergola pod consists of a freestanding or attached frame equipped with adjustable louvers, retractable fabric, or sliding panels. On a rooftop, this structure lets occupants manage sun exposure, wind, and light rain without full enclosure. Most units incorporate side screens for privacy, integrated lighting channels, and built-in gutters for water management. Aluminum frames predominate because they remain light, resist corrosion, and assemble quickly.
The interior can function as a dining area, lounge, home office, or compact entertaining space. Choose weather-resistant furniture with removable cushions, then position seating to maintain clear access to doors, drains, and controls. Light-colored surfaces reduce heat gain, while outdoor rugs can define zones without adding significant weight.
Required Tools and Materials
- Measuring tape of at least 25 feet
- Carpenter level for slope verification
- Notebook or digital sketching application
- Protective gloves and safety glasses
- Rooftop-rated fasteners and waterproof sealant
Kit purchases should include mounting brackets, drainage fittings, and either a motorized or manual retraction system. A cordless drill, socket set, soft brush, and caulking tool can simplify assembly and later maintenance. Keep replacement gaskets, compatible lubricant, and spare fasteners available for routine repairs.
Installation Sequence
Measure the Space
Record the usable deck dimensions and maintain a minimum three-foot clearance on all sides for access and airflow. Align the pod footprint parallel to the building edge. Note door swings, stair openings, railings, planters, and drainage grates before finalizing the layout.
Verify Structural Capacity
Calculate added load. Typical aluminum systems weigh eight to twelve pounds per square foot. Engage a licensed structural engineer when load capacity remains uncertain. Account for furniture, screens, accumulated rain, and wind forces, not just the empty frame weight.
Select Roof Style
Retractable fabric offers maximum flexibility. Louvered metal roofs provide complete shade and superior rain shedding. Hybrid models allow users to tilt slats or roll back fabric as conditions change. Consider the direction of prevailing sunlight, nearby buildings, and the level of privacy required when comparing roof styles.
Secure the Frame
Employ ballast blocks or approved rooftop anchors. Avoid penetrating membrane roofing without professional sealing to preserve warranties. Place protective pads below ballast and confirm that anchors do not block existing drainage routes.
Incorporate Accessories
Add low-voltage LED strips, side screens, or outdoor heaters inside conduit to protect wiring from moisture. Use dimmable lighting for dining and brighter task lighting near work surfaces. Fans can improve comfort, but every electrical component must be rated for outdoor exposure.
Final Inspection
Cycle the canopy multiple times to confirm smooth operation. Tighten fasteners and examine all seals for gaps. Open and close screens, test drainage, and verify that accessories remain clear of moving louvers.
Safety Practices
- Wear gloves during metal handling.
- Stabilize ladders and avoid leaning on railings.
- Disconnect power before electrical connections.
- Halt work when wind speeds exceed fifteen miles per hour.
Keep tools secured so they cannot slide toward roof edges. Never use a rooftop pod as a substitute for a required guardrail. Children and guests should receive simple instructions about moving panels, heaters, and motor controls.
Common Issues and Corrections
Canopy binding usually results from debris in the tracks. Clean with mild soap and apply silicone lubricant. Water pooling indicates uneven tension, adjust cords uniformly. Frame movement in wind requires re-torquing anchors or adding ballast. Overflow at gutters calls for regular leaf removal.
Condensation may appear when warm air meets cool panels. Improve ventilation by opening side screens or tilting louvers. If a motor becomes noisy, stop operation and inspect for obstructions rather than forcing the mechanism. Persistent leaks or movement require professional evaluation.
Ongoing Care
Wipe frames monthly with a damp cloth. Inspect seals each season and apply outdoor silicone to minor gaps. Retract fabric before heavy snow or high winds. Store removable panels indoors during winter with silica gel to limit ultraviolet exposure.
Wash fabric according to the manufacturer’s instructions, avoiding harsh cleaners that can weaken coatings. Check mounting plates for corrosion, especially in coastal areas. Keep planters and furniture several inches away from posts so air can circulate and maintenance remains accessible.
Cost and Schedule Expectations
Kit prices range from three thousand to nine thousand dollars according to size and motorization. Professional installation requires one to three days. Reserve an additional ten percent of the budget for hardware and unforeseen adjustments.
Additional costs can include electrical work, custom flashing, engineering reviews, delivery, and surface protection. A detailed quotation should identify each item, warranty coverage, and responsibility for membrane repairs. Comparing total installed cost is more useful than comparing kit prices alone.
Seasonal Tasks
Spring requires pollen removal before first use. Summer checks focus on motor cable condition. Fall gutter clearing precedes storm season. Winter storage protects screens from ultraviolet degradation.
Review the roof surface whenever furniture is moved. Look for blocked drains, cracked sealant, or changes in membrane condition. A short inspection after severe weather can prevent minor issues from becoming costly interior leaks.
Professional Assistance
Uneven surfaces, built-in planters, or concealed drainage channels warrant a licensed contractor. Professionals confirm load ratings and fabricate custom flashing to protect the roof membrane.