Cool Decks by 20 Degrees: Shade Sails Provide Electricity-Free Cooling
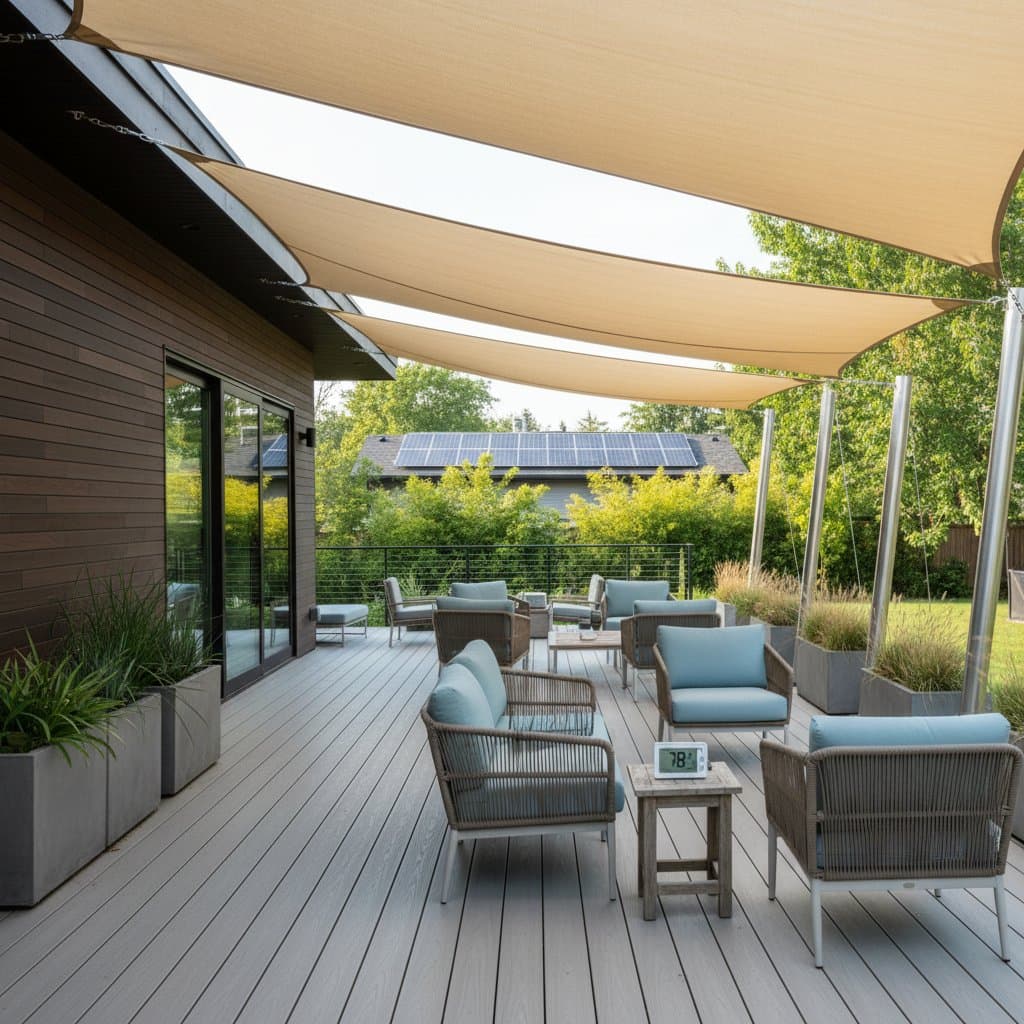
Decks often become uncomfortably hot by midday, and air conditioning offers no relief in outdoor spaces. Individuals seek cooler environments without relying on additional electric fans or misting systems. Shade sails address this need effectively. These structures block direct sunlight, reduce surface temperatures by up to 20 degrees Fahrenheit, and introduce an architectural element that requires no ongoing power.
Installation typically requires one weekend, along with basic tools and thoughtful preparation. This guide details the nature of shade sails, their cooling mechanism, secure mounting techniques, and maintenance strategies for year-round durability.
Essential Tools and Materials
Assemble the necessary components and equipment prior to beginning the project. A single 12-foot triangular shade sail covers approximately 100 square feet. Larger decks may require two or three sails arranged in an overlapping configuration for comprehensive coverage.
Materials:
- One or more shade sails constructed from high-density polyethylene (HDPE) or acrylic-coated polyester
- Stainless steel turnbuckles or tensioners, with three per triangular sail
- Mounting hardware including pad eyes, eye bolts, or wall plates
- Galvanized or stainless steel chain or cable, at least six feet per sail
- Optional post anchors, concrete mix, and metal poles for situations without existing attachment points
Tools:
- Measuring tape extending at least 25 feet
- Power drill equipped with masonry or wood bits
- Wrench and screwdriver set
- Ladder sufficient to reach anchor heights
- Safety gloves and eye protection
Key Safety Considerations
Wear gloves when adjusting tensioners to avoid injuries from sharp metal edges. Position ladders on firm, level surfaces, and enlist a helper to stabilize the base when feasible. Refrain from installing sails near power lines or combustible materials.
Select hardware made from durable materials rather than plastic or inferior metals, which may corrode or fail under tension. Ensure adequate overhead clearance to avoid contact with branches or gutters. Properly secured sails withstand winds up to 40 miles per hour, though removal before severe storms remains advisable. Conduct inspections for fabric tears or corroded fittings prior to each reinstallation.
Cost Estimates and Timeline
A 12-foot triangular shade sail ranges in price from 40 to 90 dollars, based on fabric durability. Stainless steel hardware contributes an additional 20 dollars per attachment point. A complete kit for a medium-sized deck generally totals between 150 and 300 dollars.
Two sails double the shaded area and expense while enabling effective layering for optimal coverage. Initial installations demand about four hours, encompassing preparation and tensioning. Projects involving concrete posts necessitate an extra day for the material to cure, keeping the endeavor suitable for a weekend schedule.
Maintenance Across Seasons
Spring: Reinstate sails following an evaluation for damage accumulated over winter. Secure anchors firmly and cleanse any accumulated debris.
Summer: Inspect tension levels each month. Accumulated dust may impede airflow and diminish cooling performance.
Fall: Clear leaves from the upper surface and examine seams prior to storage. For year-round installations, remove snow accumulation immediately to avoid fabric distortion.
Winter: Dismantle sails in regions prone to high winds or heavy snow, then store them coiled in a dry container. Label sails and associated hardware for straightforward reassembly in the following season.
Situations Requiring Professional Assistance
Engage a professional for anchor installations that involve overhead masonry drilling or spans exceeding 20 feet with a single sail. Experts calculate appropriate tension and suggest optimal anchor placements for safety. Labor fees for intricate configurations typically range from 200 to 400 dollars.
Residents in areas with strong winds should consult an engineer to assess anchor specifications before attaching to structural elements. Such evaluations provide essential reassurance relative to the modest consultation expense.
Steps to Install Shade Sails
Experience the cooling effect shortly after positioning beneath a shaded deck. Surfaces moderate in temperature, air circulates unimpeded, and the area regains practicality. Follow these steps to implement the solution promptly:
-
Select the location. Identify zones receiving at least six hours of direct sunlight that require shading.
-
Measure and plan. Determine sail dimensions and angles, then indicate anchor positions using masking tape.
-
Acquire durable hardware. Opt for stainless steel components, which resist corrosion more effectively than zinc-coated alternatives.
-
Execute secure installation. Attach to robust structures or firmly embedded posts, confirming the stability of each anchor point.
-
Perform ongoing maintenance. Regularly clean, adjust tension, and store sails to ensure longevity across multiple seasons.
Emphasize reliable anchors, pristine fabric, and consistent upkeep to secure prolonged comfort without additional energy consumption. Decks remain temperate, vistas unobstructed, and utility costs unchanged.