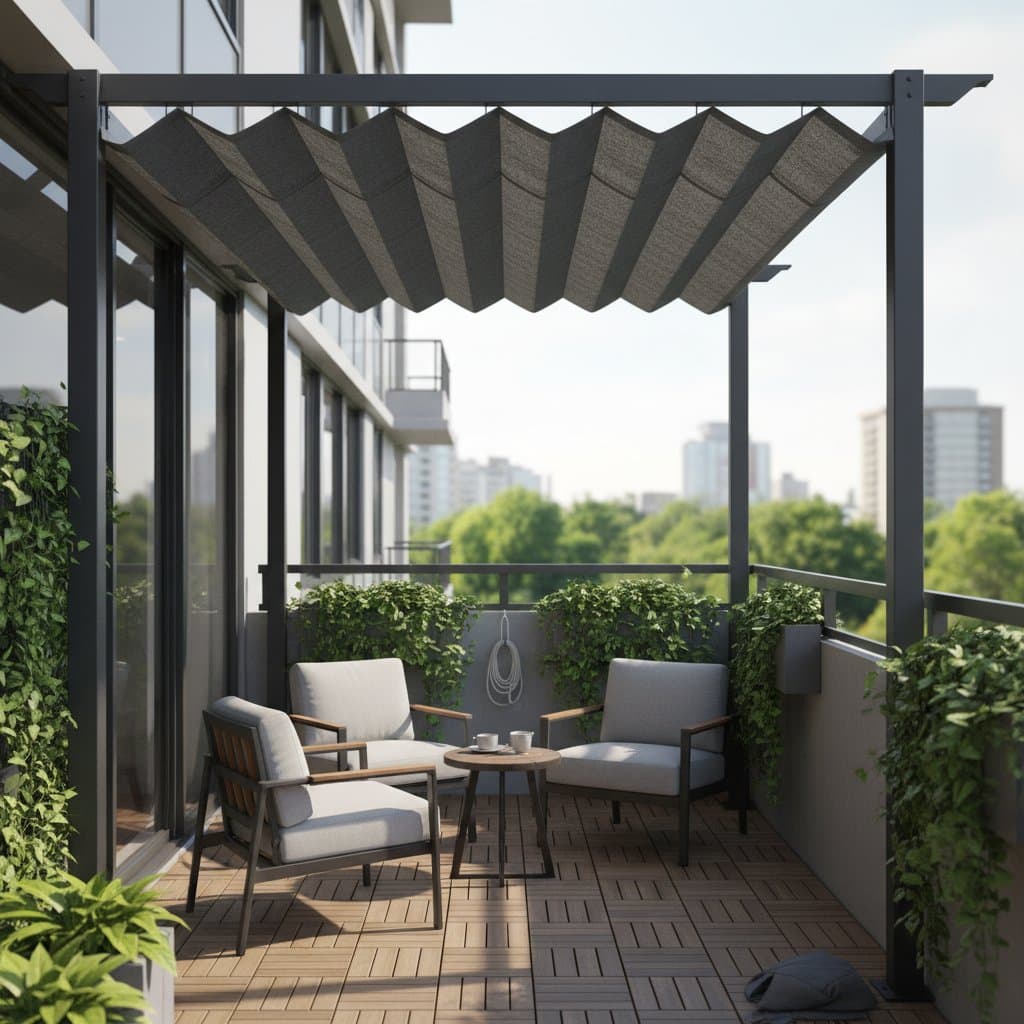
5. Add the Canopy
Position the canopy fabric along the designated track. Secure it using slides or Velcro attachments as specified by the manufacturer. Distribute tension uniformly across the fabric to avoid sagging in any area. Verify that the canopy extends and retracts smoothly via the pull mechanism or crank handle. Should the corners bind during operation, slightly loosen the side bolts, realign the fabric edges, and retighten.
6. Test the Mechanism
Operate the pergola through full open and closed cycles at least three times. Observe the folding action of the fabric and the settling of the frame components. If a corner resists movement, apply a small amount of lubricant to the affected area or adjust the pivot joint for better alignment. This testing phase ensures reliable performance before regular use.
7. Perform Final Inspection
Secure all connections by tightening bolts and fasteners to the recommended torque levels. Clean debris from the mounting brackets and surrounding surfaces. Organize and store installation tools safely. Step back to assess the shade's alignment across the balcony space. Confirm that adjacent doors and furniture remain accessible without obstruction.
Essential Safety Guidelines
Before commencing installation, review your building's regulations regarding modifications to exterior walls or railings. Certain structures mandate the use of clamp-style mounts to preserve integrity. For balconies exposed to strong winds, select a pergola model certified to withstand gusts up to 20 miles per hour, equivalent to 32 kilometers per hour. Always retract the canopy prior to storms to prevent damage.
Conduct monthly inspections of all bolts for signs of loosening, and tighten as necessary to maintain stability. Fold the canopy only when the fabric remains dry, thereby avoiding mildew growth. Adhere strictly to the manufacturer's weight limits; refrain from suspending heavy planters or lighting fixtures from the frame to prevent structural failure.
Common Issues and Solutions
Issue: Canopy sags in the center.
Solution: Adjust the side tension cords or reposition the crossbar to achieve uniform tautness. The fabric must remain firm without undue stretching, ensuring even shade distribution.
Issue: Water accumulates on the canopy surface after rainfall.
Solution: Tilt one side downward by approximately 1 inch, or 2.5 centimeters, per foot of width to facilitate runoff. This subtle slope promotes effective drainage without compromising aesthetics.
Issue: Bolts loosen over time, typically after several weeks.
Solution: Incorporate nylon lock washers or apply thread-seal compound to the fasteners. Wind-induced vibrations often cause standard nuts to work free, so proactive reinforcement proves essential.
Issue: Frame produces creaking sounds during operation.
Solution: Spray silicone lubricant on the moving joints. Steer clear of oil-based products, which tend to accumulate dust and exacerbate wear.
Issue: Fabric color fades prematurely.
Solution: Apply a UV-resistant protective spray annually. This treatment can double the fabric's lifespan, preserving vibrancy in urban sunlight exposure.
Cost Considerations and Timeline
Foldable pergolas vary significantly in price based on materials and features. Basic aluminum models, suitable for widths up to 8 feet or 2.4 meters, range from $120 to $250. More robust frames or those with motorized operation fall between $300 and $500. Replacement canopies cost $30 to $60, providing an economical refresh option.
A typical installation requires one afternoon for a single individual with basic skills. Professional assistance, such as from a handyman, incurs fees of $100 to $150. Maintain a supply of spare bolts and fabric clips; these minor replacements often avert the need for complete kit purchases.
For budget-conscious setups, opt for a half-width pergola if shade covers only part of the balcony. Anchor one end to the wall to reduce costs by approximately one-third while delivering targeted relief from heat.
Ongoing Maintenance Practices
Preserve the pergola's condition through routine care. Remove leaves and dust with a soft brush each week to prevent buildup. Clean the frame monthly using mild soap and water, followed by a thorough rinse. During winter months or extended absences, store the canopy indoors to shield it from harsh elements.
Examine fabric seams regularly for fraying; repair minor tears with durable outdoor fabric tape. Ensure the retracting arms extend symmetrically; uneven action indicates a need for tightening on the affected side. In compact balcony settings, these tasks demand only about 15 minutes monthly. Consistent upkeep wards off rust and prolongs canopy durability by multiple seasons.
Optimizing Storage in Limited Spaces
Integrate the pergola seamlessly into your balcony's layout for enhanced functionality. Position hanging planters beneath the shade line to sidestep interference with the fabric. Select foldable chairs that stow compactly when the canopy retracts, freeing up floor area.
Incorporate a compact storage bench, measuring around 30 inches or 76 centimeters, to organize cushions and tools efficiently. Suspend a battery-operated lantern from the frame's underside for ambient evening illumination that generates no heat on the canopy.
For those inclined toward gardening, cultivate lightweight climbing vines such as jasmine or morning glory along the frame's perimeter. These plants provide supplementary filtered shade and visual appeal without imposing additional structural load.
Indicators for Professional Installation
Engage a specialist under these circumstances:
- Residence above the tenth floor with persistent wind exposure.
- Balcony railings constructed from glass or composite materials prone to cracking under pressure.
- Wall surfaces that deteriorate or resist secure drilling.
- Plans to integrate electrical elements, including wired lighting or motorized systems, necessitating compliant wiring.
When consulting installers, inquire about load-bearing capacities, corrosion-resistant finishes, and warranty details. Insist on stainless steel or powder-coated bolts for longevity; inferior hardware corrodes rapidly in urban environments.
Next Steps for Implementation
Advance your project with these immediate actions:
- Measure the balcony's width and evaluate the sun's path. Consider whether exposure occurs primarily in the morning or afternoon to optimize bracket placement.
- Establish a budget framework. Determine preferences for manual versus motorized functionality prior to selecting a model.
- Research local suppliers for compatible options, focusing on weather-resistant materials suited to city conditions.