Glass Railings: Transforming Modern Rooftop Designs
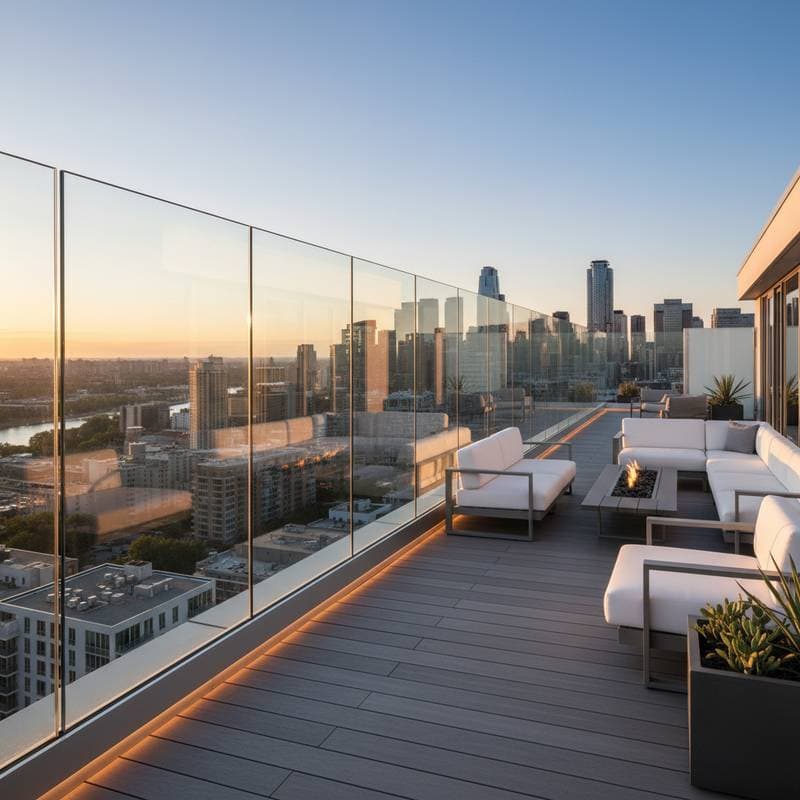
Rooftops serve as vital extensions of urban living, demanding barriers that prioritize openness, security, and visual appeal. Glass railings achieve this balance by offering unobstructed sightlines, durable construction, and subtle presence. These elements position them as the preferred option for contemporary decks and balconies, particularly in dense city environments where space and vistas hold premium value.
This guide delineates the essence of glass railings, their alignment with rooftop lifestyles, construction methods, and projections for expenses, maintenance, and safety protocols. Readers gain insights into engaging professionals and sustaining pristine condition over time.
Overview
A glass railing functions as a protective enclosure composed of tempered or laminated glass panels integrated into metal or concealed frameworks. This design supplants traditional wooden or metallic balusters with a seamless, translucent facade. Panels typically measure half an inch in thickness, equivalent to 12 millimeters, and connect via stainless steel or aluminum uprights. Certain configurations eliminate visible supports altogether, creating an illusion of invisibility from short distances.
Glass railings prevail in rooftop applications due to their equilibrium of protection and accessibility. They deliver comprehensive safeguarding without impeding panoramic views or natural illumination. This versatility accommodates industrial terraces and cozy residential platforms alike, harmonizing with surfaces such as stone, timber, or synthetic decking.
Essential Tools and Materials
For installation or upkeep of glass railings, assemble the following items:
- Tempered or laminated glass panels, generally 36 to 42 inches in height
- Mounting channels or posts crafted from aluminum or stainless steel
- Rubber gaskets and spacers to mitigate vibrations and accommodate thermal expansion
- Anchors and bolts suitable for outdoor conditions
- Sealant and end caps to safeguard against moisture ingress
- Safety equipment, encompassing gloves, protective eyewear, and slip-resistant footwear
Routine cleaning or adjustments require a microfiber cloth, gentle detergent, and suction handles for safe panel manipulation.
Installation Process
1. Measure and Plan
Precisely delineate the railing perimeter. Maintain a minimum 2-inch gap from walls or parapet edges. Verify compliance with local regulations regarding height minima and load-bearing capacities prior to procuring materials.
2. Prepare the Base
Thoroughly cleanse the installation surface. On concrete decks, employ a hammer drill to create anchor holes. For wooden substrates, select lag bolts engineered for external decking.
3. Install the Frame or Base Channel
Position the base channel or posts along the designated path. Utilize a level to confirm alignment. Secure bolts firmly yet allow minor adjustments for precision.
4. Insert Gaskets and Position Glass
Place rubber gaskets within the channel, then carefully lower glass panels. Engage two individuals for lifting, and don gloves to avert edge damage.
5. Secure and Seal
Gradually fasten clamping mechanisms, alternating between sides for even pressure. Apply a narrow layer of transparent sealant at the base to repel water. Affix stainless steel caps to endpoints for a polished finish.
6. Clean and Verify
Polish panels using a mild solution and scrutinize all connections. Ensure joints remain firm, devoid of movement or instability.
Safety Considerations
- Refrain from handling oversized glass panels solo; involve at least two people equipped with suction devices.
- Don gloves and footwear with superior grip when operating near exposed edges.
- Confirm the presence of manufacturer markings indicating tempered or laminated composition.
- Select mounting anchors capable of supporting the aggregate load of glass and components, often surpassing 10 pounds per linear foot.
Common Issues and Resolutions
Cloudiness on a panel signals potential moisture entrapment within the gasket. Excise the sealant, desiccate the zone, and reapply a fresh seal.
A tilting post necessitates loosening base fasteners, realigning with a level, and retightening incrementally.
Wind-induced rattling in glass requires inserting slender rubber shims into the base channel.
Address any fractured or nicked panels through prompt replacement, eschewing temporary repairs.
Cost Estimates and Timeline
A complete rooftop setup ranges from $180 to $350 per linear foot, influenced by glass variety, hardware finishes, and regional labor charges. Frameless variants approach the higher threshold. Smaller balconies demand approximately two days, whereas expansive perimeters may require a week with a duo of installers.
Cost reductions arise from self-managing demolition and preparatory work, though delegate glass placement to certified experts. Misaligned channels invite leaks or fractures, escalating future remediation expenses.
Ongoing Maintenance
Glass railings demand less frequent care than alternatives in wood or metal, yet periodic checks preserve integrity.
Quarterly Tasks:
- Cleanse panels with a soft cloth and neutral soap.
- Examine fittings for looseness or corrosion on fasteners.
Annual Inspections:
- Evaluate sealant integrity and renew degraded portions.
- Clear base channel drainage to avert water accumulation.
- Reinforce bolts and verify full edge support for glass.
Steer clear of abrasive compounds, acidic solutions, or high-pressure rinses, as these impair the tempered finish.
Storage and Protection Strategies
For rooftops utilized seasonally, safeguard railings during dormant periods. Employ detachable privacy screens or coverings to guard against environmental debris. Organize reserve gaskets, caps, and maintenance supplies in a designated, labeled container indoors. A compact repair kit on hand averts escalation of minor deteriorations into major overhauls.
Weather-Specific Care
In winter, remove snow and ice from base channels using a pliable brush, avoiding shovels. Opt for calcium-based deicers over salt to prevent corrosion of metallic elements.
During summer, weekly rinsing eliminates dust accumulation for sustained clarity. Thermal expansion in metals warrants midseason verification of screw tensions.
Such practices ensure resilience and lucidity across climatic variations.
Engaging Professional Assistance
Summon experts when encountering:
- Cracks or chips exceeding dime size.
- Instability or oscillation under pressure.
- Plans for incorporating illumination or merging with vegetative roofing.
Specialists evaluate structural demands, substitute impaired sections, and uphold code adherence. Request documentation of glass tempering, insurance coverage, and component guarantees prior to commencement.